
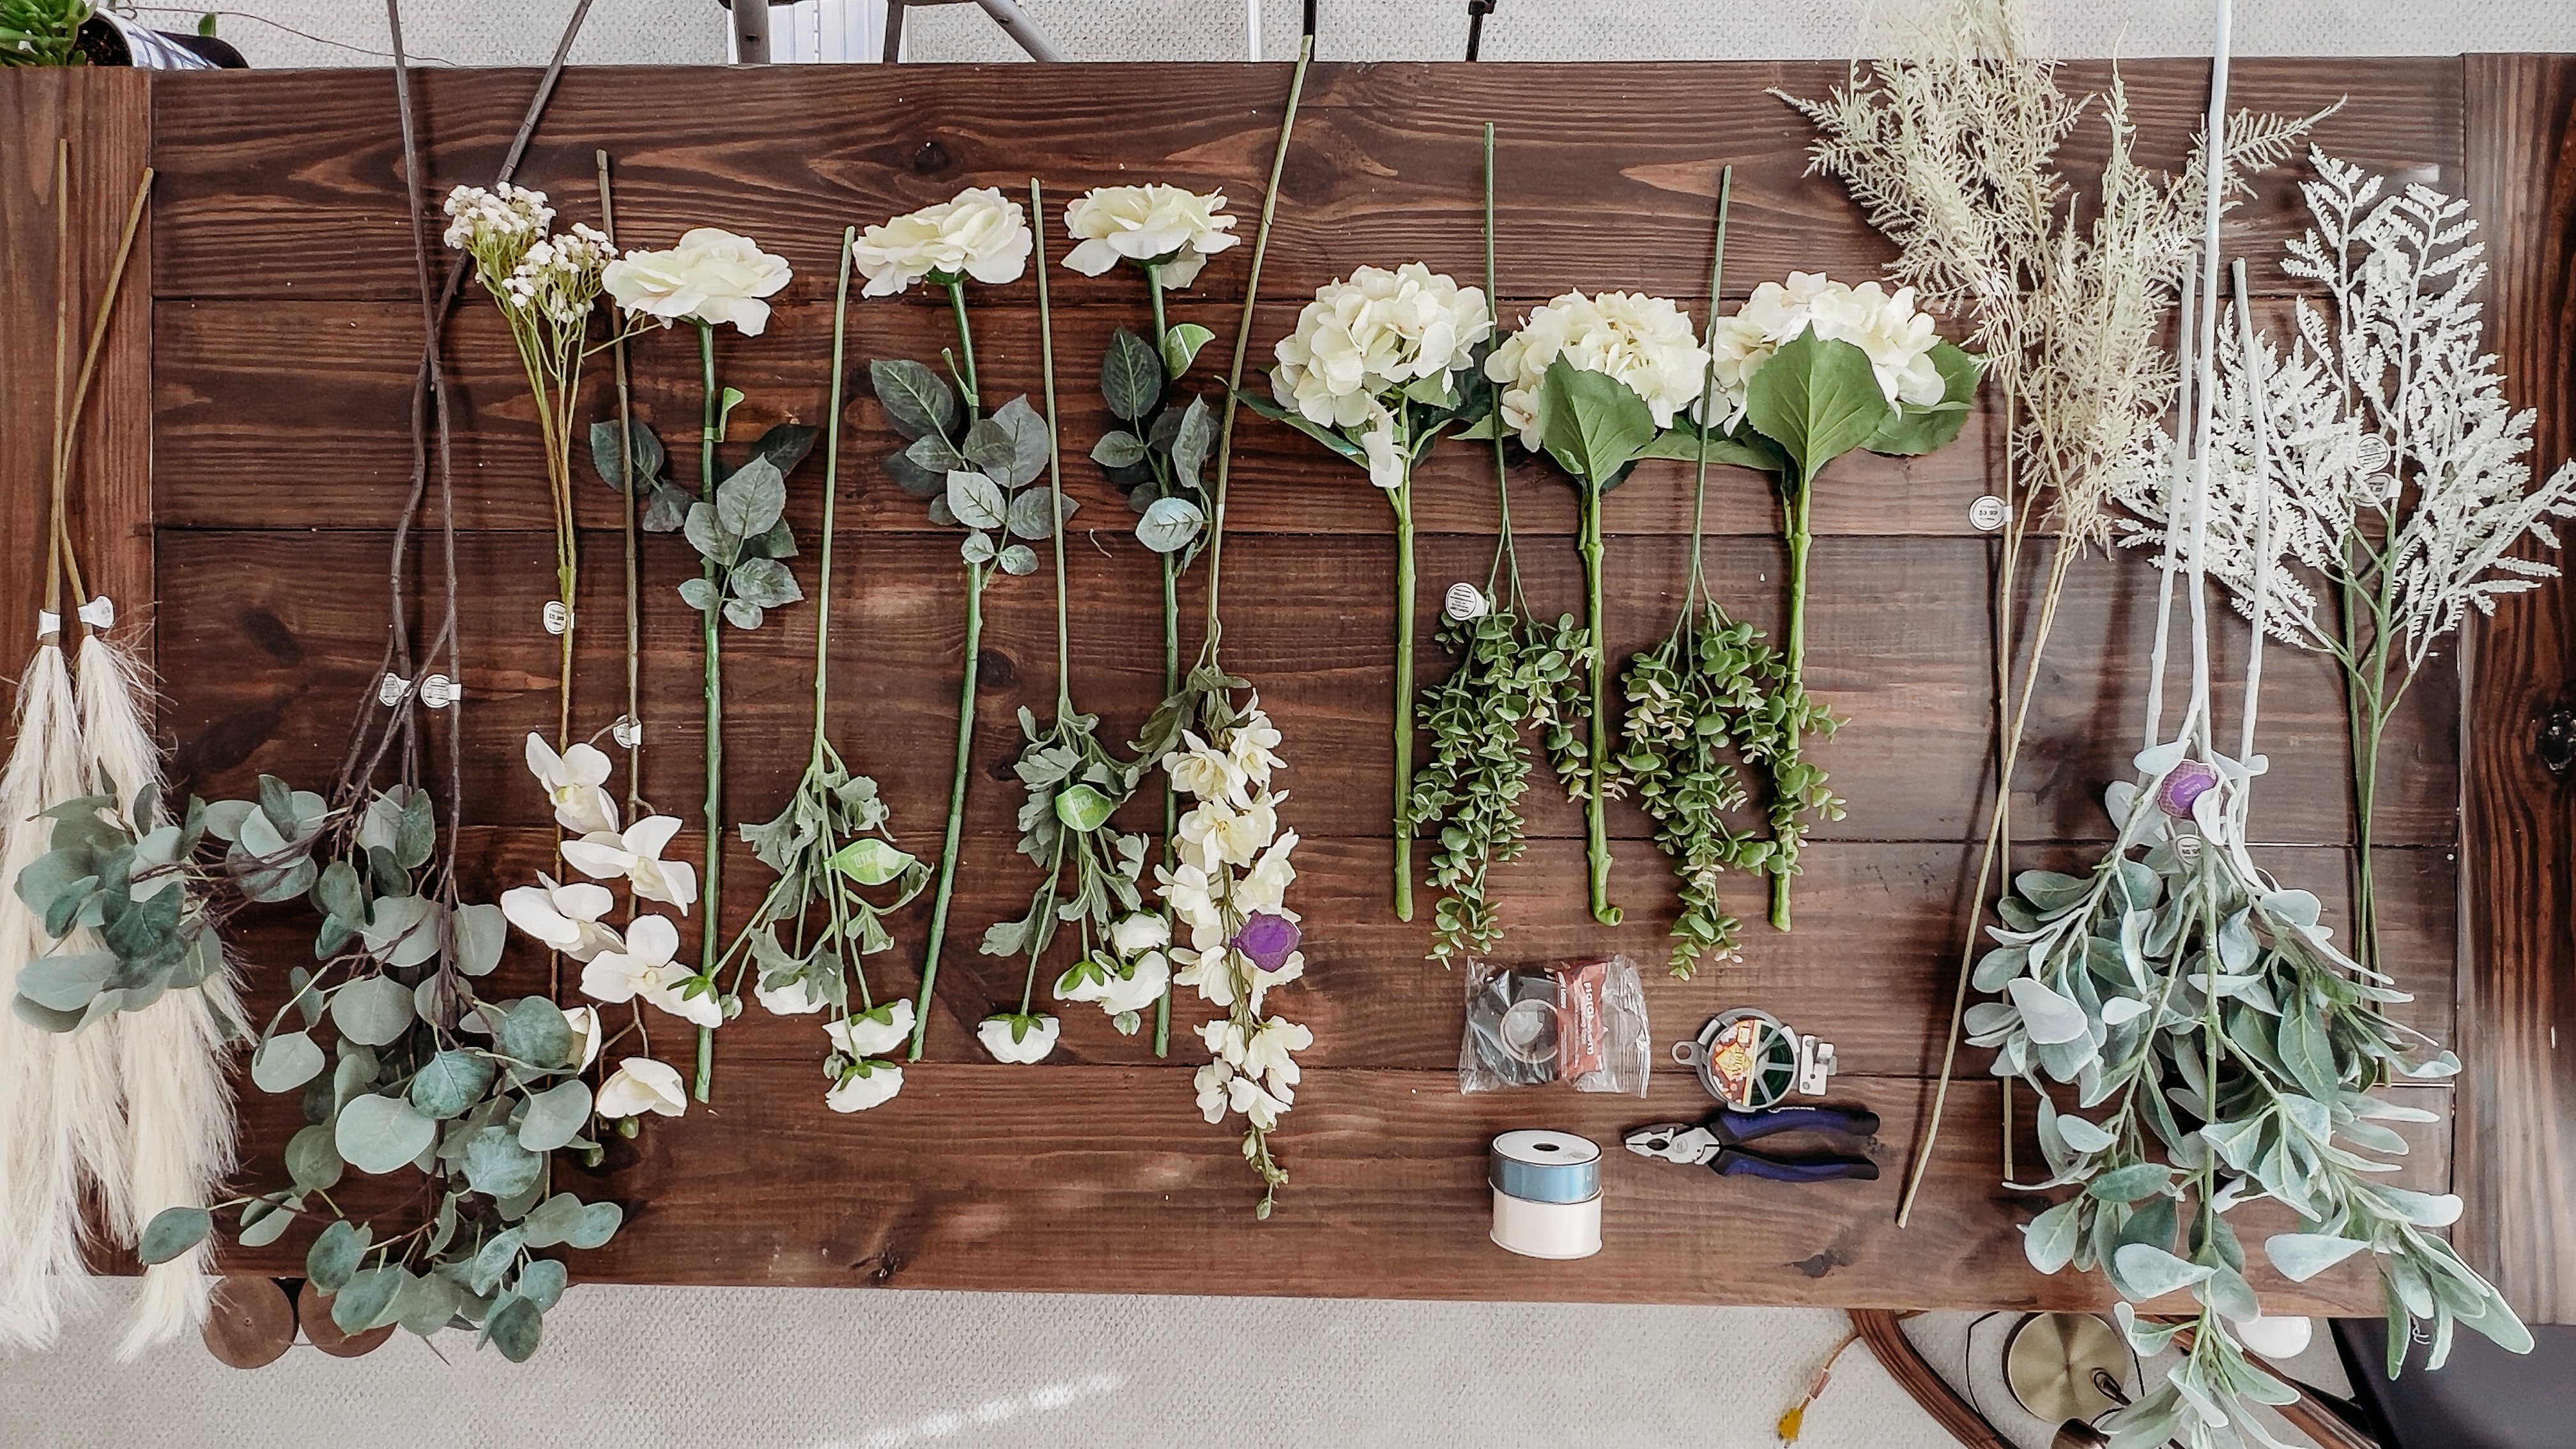
Wedding florals can get pricey, especially if you plan to do your bridal session on a separate date from your wedding. DIY-ing a faux floral bouquet is cost-efficient and it can be used multiple times!
Want to learn how to make your own faux floral bouquet? Read below or follow this link to my full YouTube tutorial!
I’ve been itching to make a bouquet for a while, but I finally have a legit reason! I’m starting my journey into bridal portraits and my sweet sister-in-law asked me to do hers!!
Perfect. Opportunity.
She’s getting married in June of 2023, and I’m honored to do her bridals. She wanted to be able to use the same flowers for portraits as her wedding, but wasn’t set on having fresh flowers for either. They’re beautiful, don’t get me wrong. But TWO bridal bouquets for two separate dates? Kiss your money goodbye!!! Faux florals can get used for both sessions and look real enough for photos— not to mention cost a fraction of the real thing!

What you’ll need:
– Favorite faux florals (I used all florals pictured above)
– Wire cutters
– Floral stem tape
– Ribbon to wrap the stems (I used two colors)
– Hot glue gun w/ hot glue
Pictured but didn’t use:
– floral wire
Total cost for this bouquet: $120 US
All my items were purchased from Hobby Lobby (not sponsored or compensated, just being transparent). I highly recommend purchasing when they have 50% off florals like I did!


Start by creating a base. For mine, I used three large roses and baby’s breath. I added two stems of what I think is a type of eucalyptus (maybe??? I don’t know flowers y’all. They just look pretty, okay?!).
Then wrap the stems with floral tap to secure. Add two smaller rose sprays (mine may be ranunculus.. but again, I’m clueless!).


Next I added some height with two different types of flowers. Orchid and snapdragon (*continues googling flower types*)?
It looks pretty and adds height. That was the goal so… mission accomplished!
Then I added another kind of eucalyptus. I cut some pieces from the larger stem and placed them throughout the bouquet for a more even distribution.
Hydrangeas were next (this one I know the name, woohoo!) to add volume to the base of the bouquet and to hide all the stems.
Add floral tape as needed around the base for stability and so your hand can rest a bit. Mine got tired from having a death grip on the stems for so long!


Next up was what I think is called lamb’s ear. It’s velvety, almost blue-hued, and so pretty. I added some on either side, and small cuttings throughout.
I finished up the body of the bouquet with some sparkly-ish and branch-like pieces that added with and *drama*.
Finish up with floral tape up and don’t the entire stem, and be sure the stems are cut to the length you’d like.


The last step is to wrap your stems!
I was worried about the wires in the stems cutting and poking, so I made a “cradle” of ribbon by glueing ribbon in a U shape under the stems until covered. The pieces where the glue is done will be wrapped by the other ribbon (the video may make this part easier to understand).
I tied a tight knot in the center of the stems, then wrapped towards the flowers and all the way down. Once I got to a point where I felt it was sufficiently wrapped I hot glued the end of the ribbon down.
Final photos below!
1. Bouquet as it will be in the wedding
2. The final wrap
3. We’re tucking some pampas in for more *drama* in the bridal portraits!


Will you be doing a faux floral bouquet for your wedding? Here’s what the final bouquet looks like in bridal photos:


Ready to book your bridal photos in DFW?
Check availability below and let’s do it!
Leave a Reply